Key Highlights
- Learn to solve browsing issues by clearing the DNS cache in your Chrome browser.
- Access a hidden tool by typing
chrome://net-internals/#dns into the address bar.
- Use the “Clear host cache” button to easily purge outdated DNS history and records.
- Understand that Chrome’s DNS cache is separate from your operating system’s cache.
- For persistent issues, you may also need to use the
flushdns command in your OS.
- Flushing the DNS cache can resolve connectivity problems and incorrect website redirects.
Introduction
Are you facing frustrating connectivity errors or slow loading times on Google Chrome? The issue might be a corrupted or outdated DNS cache. Your browser stores a temporary record of website addresses to speed up browsing, but this browser cache can sometimes cause problems. This guide will show you how to use a powerful, built-in Chrome tool, chrome://net-internals/dns, to clear your DNS cache. Mastering this simple fix can resolve many common browsing issues and improve your internet experience.
Understanding DNS History and Cache in Google Chrome
Your Google Chrome browser maintains its own internal DNS cache to speed up how quickly it can find and load websites. This cache is a temporary database of DNS records that connects website names to their IP addresses, reducing the need to ask an external server every time you visit a site.
However, when this information becomes outdated, it can lead to problems. Understanding what this cache is and why it matters is the first step toward troubleshooting effectively. The following sections will explore how Chrome stores this data and the difference between deleting history and flushing the cache.
How Chrome Stores DNS Data and Why It Matters
The Chrome browser uses its own internal DNS cache, which operates independently from your computer’s main DNS cache. When you type a domain name into the address bar, Chrome first checks this local storage for the corresponding IP address. This design choice helps accelerate page loading for sites you visit frequently.
This process matters because if a website changes its IP address, your browser might still hold the old, outdated DNS records. This leads to connection errors or prevents you from seeing the latest version of the site. You might find yourself unable to access a website that others can reach without issue.
Therefore, clearing this cache becomes essential for troubleshooting. Forcing the Chrome browser to discard its stored DNS records and fetch new ones ensures you have the most up-to-date information, resolving many common access problems. The process involves accessing a specific internal page and clicking a single button.
Differences Between DNS History Deletion and Cache Flushing
While the terms “deleting DNS history” and “flushing DNS cache” are often used interchangeably, they refer to slightly different concepts. DNS history can be thought of as the log of lookups, while the DNS cache is the active storage of those lookups for future use.
In the context of the Chrome browser, the action you take in net-internals effectively does both. When you use the tool to clear the host cache, you are flushing the stored records, which in turn deletes the browser’s immediate memory of those DNS lookups. For practical purposes, the single action achieves both outcomes.
Here is a simple breakdown to clarify the distinction:
| Feature |
DNS History Deletion |
DNS Cache Flushing |
| Primary Goal |
To remove the record of past DNS lookups. |
To clear temporarily stored DNS data to force a fresh lookup. |
| Action in Chrome |
Accomplished by the same action that flushes the cache. |
The direct function of clicking “Clear host cache.” |
| Effect |
Removes traces of visited domains from the DNS resolver. |
Resolves issues with outdated IP addresses and connectivity. |
Accessing chrome://net-internals/dns for DNS Management

Google Chrome includes a suite of internal diagnostic pages, and chrome://net-internals is one of the most useful for network troubleshooting. This tool provides a deep look into the browser’s network activity, including a specific DNS page for managing its internal DNS cache.
Using this interface, you can view active DNS records and, more importantly, clear them with a single click. The following sections will guide you on how to navigate to this page and understand the information you’ll find there, giving you direct control over Chrome’s DNS behavior.
Navigating to the DNS Internals Page in Chrome
Accessing the tool to manage your browser’s DNS cache is straightforward. You do not need to install any extensions or software; the feature is built directly into the Chrome browser. This makes it a quick and accessible first step for troubleshooting.
First, open Chrome on your computer. Ensure you have a browser window active. Then, direct your attention to the address bar at the top of the screen, where you would normally type a website URL.
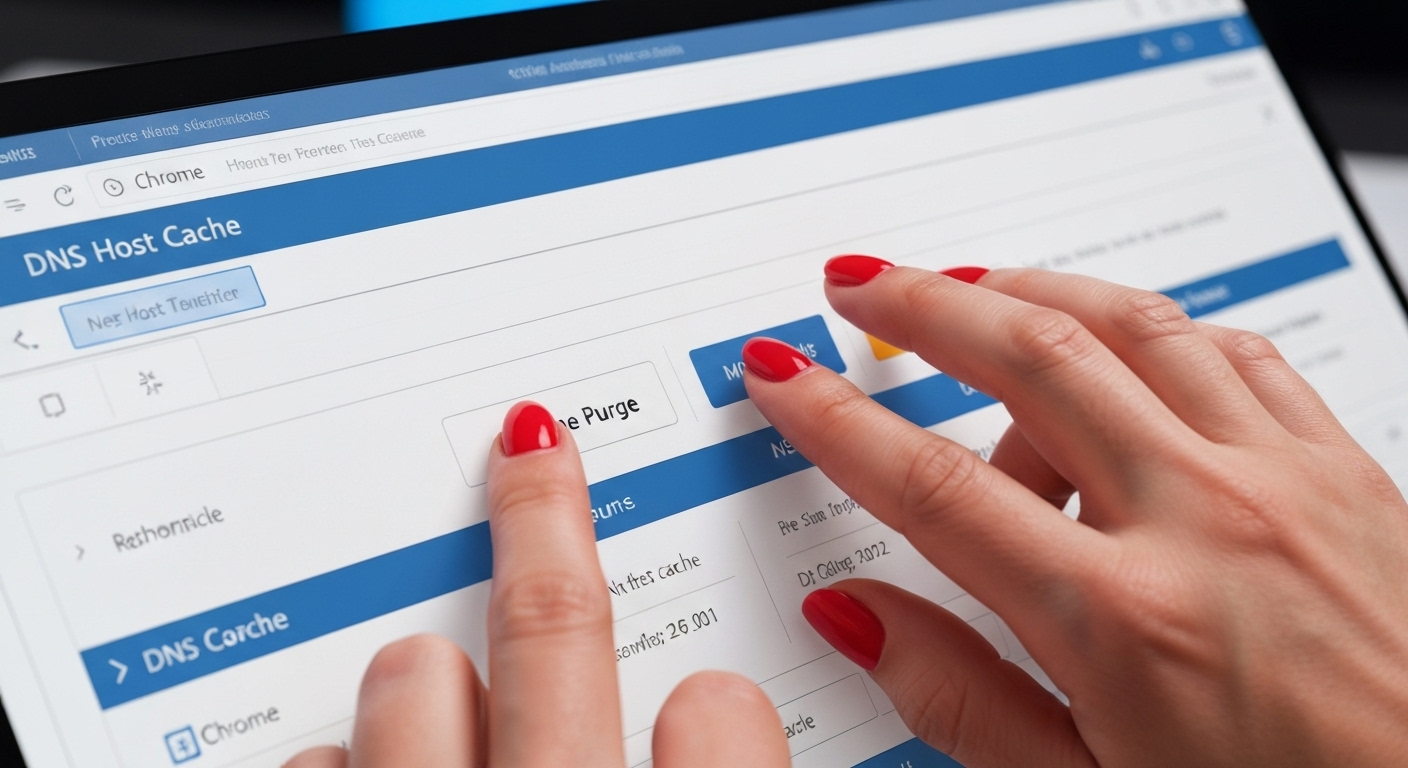
In the address bar, type chrome://net-internals/#dns and press Enter. This command will take you directly to the DNS page within Chrome’s network diagnostics suite. You will immediately see the interface for managing the host cache.
What You’ll See on the DNS Dashboard
Once you arrive at the DNS dashboard, you might see a table of information that looks technical. This is the host resolver cache, which lists the domain names your browser has recently looked up and their corresponding IP addresses. You do not need to understand every detail to solve your problem.
The most important feature on this page is the “Clear host cache” button. This is the primary tool you will use to flush the DNS cache. Clicking this button tells Chrome to immediately discard all the stored DNS information it has.
On the DNS dashboard, you will find:
- Host resolver cache: A list of active and expired DNS entries stored by Chrome.
- Clear host cache button: The main function to purge the browser’s DNS cache.
- DNS lookup information: Details about resolved domains, including their IP addresses and expiration times.
Step-by-Step Guide to Deleting DNS History in Chrome
Now that you know how to access the tool, you can proceed with deleting your DNS history. The process is quick and can be completed in just a few clicks. For a more comprehensive refresh, it is also a good practice to flush socket pools, which are the saved connections your browser keeps open.
The following steps will walk you through exactly how to clear the host cache and then flush the socket pools in your Chrome browser. This two-part process ensures a complete reset of Chrome’s network connection data.
Clearing the Host Cache Using the Purge Button
The primary step to resolve DNS-related issues in Chrome is to clear the host cache. This is done using the purge button available on the Net Internals page. This action forces Chrome to perform a new DNS lookup the next time you visit any website.
There is no confirmation message after you click the button, but the action is immediate. The list of cached hosts on the page will disappear, indicating that the DNS cache has been successfully cleared.
Here is the step-by-step process:
- Open the Google Chrome browser and type
chrome://net-internals/#dns into the address bar, then press Enter.
- Locate the button labeled “Clear host cache.”
- Click the “Clear host cache” button to instantly flush the internal DNS cache.
Checking If DNS History Was Successfully Deleted
After you have cleared the cache, you may want to verify that the process worked. The easiest way to check is right on the chrome://net-internals/#dns page. Before clearing, the “Host resolver cache” table shows a list of DNS records. After you click the clear button, this table should become empty.
For a more thorough refresh, it’s also recommended to flush socket pools. You can do this by navigating to chrome://net-internals/#sockets and clicking the “Flush socket pools” button. This closes old connections and forces new ones to be established.
A practical way to confirm the fix is to simply try visiting the website that was causing problems. If the site now loads correctly, it is a strong indicator that clearing the DNS cache has resolved the issue. For technical users, command-line tools can also show that new DNS records are being fetched.
Troubleshooting Common Issues While Deleting DNS History
What happens if clearing the DNS cache in your Chrome browser does not solve the problem? Sometimes, the issue lies outside of Chrome’s internal cache. The problem could be with your operating system’s DNS cache or even an experimental browser feature interfering with the connection.
If typing chrome://net-internals/#dns into the address bar and clearing the cache did not work, do not worry. The next sections cover common reasons why the process might fail and provide alternative fixes, such as using flushdns commands.
Reasons Why DNS Cache May Fail to Delete
If your connectivity issues persist after clearing Chrome’s host cache, the problem likely originates from a different source. The browser cache is just one layer of DNS caching; your operating system also maintains its own DNS resolver cache.
An outdated entry in your operating system’s cache can override Chrome’s fresh lookup, causing the problem to continue. In other cases, experimental Chrome Flags you may have enabled could be interfering with normal network operations.
Here are common reasons why clearing the DNS cache might not work:
- Operating System Cache: The DNS issue is stored in your Windows, macOS, or Linux DNS cache, not Chrome’s.
- Router Cache: Your internet router may have its own DNS cache that is holding onto old data.
- Server-Side Issues: The problem might not be on your end at all but with the website’s DNS server itself.
Fixes for Problems With the DNS Internals Tool
When the net-internals tool in the Chrome browser isn’t enough, you need to broaden your troubleshooting. The next logical step is to clear the DNS cache at the operating system level. This ensures that no old records are stored anywhere on your machine.
Each operating system has a specific command for this. On Windows, you use the ipconfig /flushdns command in the Command Prompt. On macOS and Linux, similar commands are available through the Terminal. These actions force your entire computer to forget old DNS entries.
If that still does not work, consider these other fixes:
- Restart DNS Client Service: On Windows, you can restart the “DNS Client” service through
services.msc or with command-line commands (net stop dnscache and net start dnscache).
- Reset Chrome Flags: Go to
chrome://flags and click “Reset all” to disable any experimental features that might be causing conflicts.
- Reboot Your Router: A simple reboot can often clear a router’s cached DNS data.
Effects of Deleting DNS History on Your Browser Experience
You might wonder what happens to your saved data when you clear the DNS cache. The good news is that this action is very specific and will not affect your personal information. Deleting DNS records is separate from clearing your general browser cache, which stores things like images, cookies, and your browsing history.
The only noticeable effect might be a slight delay the first time you visit a website after clearing the cache, as your browser needs to perform a fresh lookup. We will explore exactly what data is and is not affected in the following sections.
Will Your Browsing History or Saved Data Be Impacted?
It is important to understand that clearing the DNS cache is a safe operation that will not delete your personal data. Your browsing history, saved passwords, bookmarks, and autofill data are stored separately and are completely unaffected by this process.
The DNS cache only deals with the association between a domain name and its IP address. It is part of the technical backend of how your browser finds websites. The browser cache, on the other hand, stores content like images, scripts, and cookies to make websites load faster on subsequent visits.
Think of it this way: flushing the DNS cache is like updating your phone’s contact list for a person’s new number. It does not delete your past text messages or photos with them. Your saved data remains secure and untouched.
Need to Restart Chrome After Flushing the DNS Cache?
Do you need to restart Chrome after you flush the DNS cache? While not always mandatory, it is a highly recommended step. A restart ensures that all components of the Chrome browser are fully refreshed and that the old cache data is completely discarded from memory.
After you perform a flushdns at the operating system level or clear Chrome’s host cache, a simple reset of the browser helps apply the changes universally. This is especially true if you also flushed the socket pools, as a restart will establish all-new network connections.
To be certain your troubleshooting is effective, it is best practice to close all Chrome windows and tabs and then reopen the application. This ensures a clean slate and gives you the best chance of resolving the underlying connectivity issue.
Advanced DNS Management Tips for Chrome Users
For developers and power users, the Chrome browser offers more than just clearing the entire host cache. If you need more granular control or deeper insights for DNS management, you can use other built-in features like the Developer Tools.
These advanced tools allow for more nuanced DNS troubleshooting beyond the simple “clear all” approach. The following sections will cover whether you can perform selective deletions and how to use Developer Tools for more complex network diagnostics.
Selective DNS History Deletion for Specific Sites
A common question from advanced users is whether it is possible to perform a selective DNS history deletion for specific sites. Unfortunately, the chrome://net-internals/#dns tool does not provide a feature to remove DNS records for a single domain name.
The “Clear host cache” button is an all-or-nothing function; it purges the entire cache of DNS records stored by Chrome. There is no built-in interface to pick and choose which entries to delete.
This design is for simplicity and to ensure that complex dependencies between DNS entries do not cause further issues. If you are a developer needing to test a specific site, the best approach is to clear the entire cache and then immediately visit the site in question to get a fresh record.
Using Developer Tools for Deeper DNS Troubleshooting
For more advanced DNS troubleshooting, the Chrome Developer Tools offer powerful features. This panel provides a real-time look at network requests, which can help you diagnose complex issues beyond a simple stale cache. You can open it by pressing F12.
One of the most useful features for DNS issues is the “Disable cache” checkbox in the “Network” tab. When this is enabled, the Chrome browser will not use its cache for any network requests as long as the Developer Tools panel is open. This is perfect for testing how a site loads with fresh data without repeatedly clearing the cache.
To use this for deeper troubleshooting, you can:
- Press F12 to open Developer Tools and go to the “Network” tab.
- Check the “Disable cache” box.
- Reload the webpage to see a full log of all network requests, including DNS resolution times.
Alternative Ways to Clear DNS Cache Beyond Chrome
If clearing the cache inside Chrome does not fix your issue, the problem might reside at the operating system level. Your computer maintains its own DNS cache, which all applications, including other browsers, use. Clearing this system-wide cache is a crucial troubleshooting step.
You can do this using the Command Prompt on Windows or the Terminal on macOS and Linux. The following sections will detail these commands and also explain how to manage the DNS cache in other popular browsers.
Using Command Prompt or Terminal for DNS Flushing
Every major operating system provides a way to flush the DNS cache using a command-line interface. This action removes all stored DNS entries from your computer, forcing it to fetch new ones from your DNS server.
For Windows users, open the Command Prompt as an administrator and type the command ipconfig /flushdns, then press Enter. According to Microsoft’s documentation, this command “flushes and resets the contents of the DNS client resolver cache.” [Source: Microsoft Learn, https://learn.microsoft.com/en-us/windows-server/administration/windows-commands/ipconfig]
On macOS, open the Terminal and run sudo dscacheutil -flushcache; sudo killall -HUP mDNSResponder. For most modern Linux distributions, the command is sudo systemd-resolve --flush-caches. These commands are the most effective way to ensure that no stale DNS data remains on your machine.
Managing DNS Cache in Other Popular Browsers
Managing the DNS cache in other browsers is often similar to the process in Chrome, especially for those built on the same Chromium engine, like Microsoft Edge and Opera. For these browsers, you can typically use their version of the net-internals page.
For non-Chromium browsers like Firefox or Safari, there isn’t a direct equivalent to chrome://net-internals/dns. However, you can achieve a similar result by clearing the general browser cache or using a new incognito window, which does not use the existing DNS cache.
Here are some ways to manage DNS cache in other browsers:
- Chromium Browsers (Edge, Opera): Use
edge://net-internals/#dns or opera://net-internals/#dns and click “Clear host cache.”
- Firefox: Clearing the history and site data (
Ctrl+Shift+Del) can help refresh the cache. Some advanced users modify settings in about:config.
- All Browsers: Opening a new incognito window or private session bypasses the existing cache for a clean browsing session.
Conclusion
In summary, managing your DNS history in Google Chrome is crucial for optimal browsing performance and privacy. Understanding how DNS data is stored and processed allows users to effectively navigate the chrome://net-internals/dns interface for clearing history. By following the steps outlined in this guide, such as using the purge button and troubleshooting common issues, you can ensure a smoother browsing experience. Remember that while deleting DNS history can enhance performance, it is essential to be aware of its implications on your browsing habits. If you’re experiencing persistent DNS issues, consider exploring alternative methods for DNS management or seeking expert advice. Your online experience matters, so take control of it today!
Frequently Asked Questions
Can I delete DNS history for only one website in Chrome?
No, the built-in tool in the Chrome browser does not support selective DNS history deletion. The “Clear host cache” function purges the entire cache for every domain name at once, not just a specific one.
Does clearing DNS cache affect my passwords or autofill data?
No, clearing the DNS cache will not affect your saved passwords, autofill data, or browsing history. The DNS cache is separate from the browser cache that stores your personal data, so your information remains safe in the Chrome browser.
Is deleting DNS history necessary for better privacy or security?
While not a primary privacy tool, deleting DNS history can enhance security in specific cases, such as after a DNS poisoning attack. Clearing the DNS cache ensures your Chrome browser connects to legitimate servers, but regular deletion is not necessary for general privacy.